×
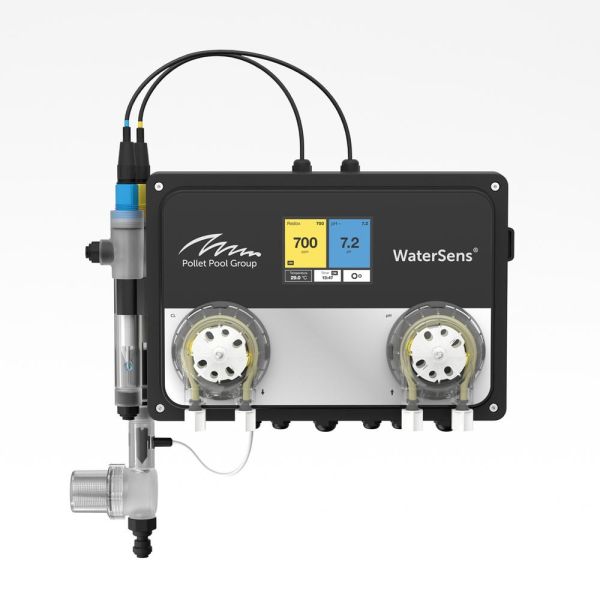
Tips for Watersens NET
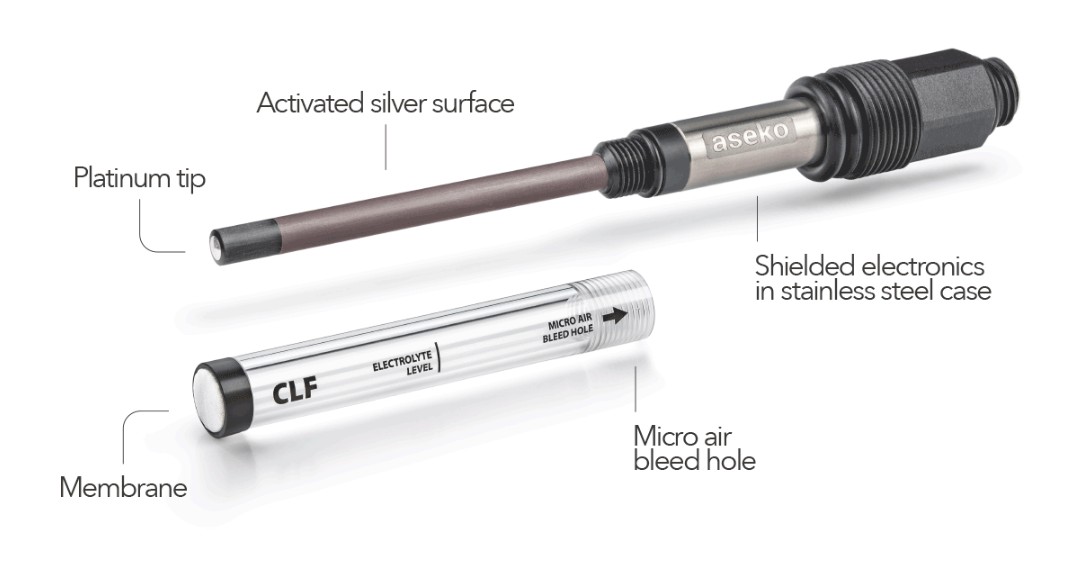
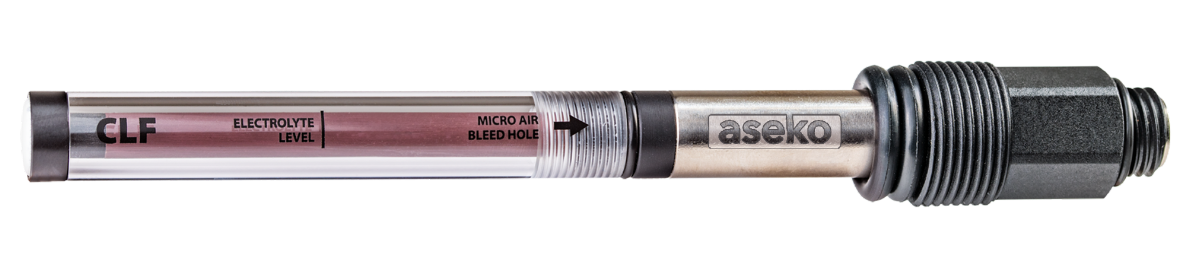
Aseko CLF-sonde - Korrekt installation og svar på typiske spørgsmål
Aseko CLF-sonden er et pålideligt værktøj til måling af frit klor i vand. Korrekt installation, nøjagtig kalibrering og regelmæssig vedligeholdelse sikrer præcise målinger.
Her får du et praktisk overblik - med svar på ofte stillede spørgsmål og nyttige tips fra den virkelige verden.
| CLF-sonden måler koncentrationen af frit klor (HOCI og OCI) elektrokemisk. En kemisk reaktion ved katoden skaber en elektrisk strøm, som svarer til mængden af frit klor i vandet. Takket være materialer af høj kvalitet har sonden en langt længere levetid end standardsonder af glas eller plast. |
Vigtige trin fra manualen
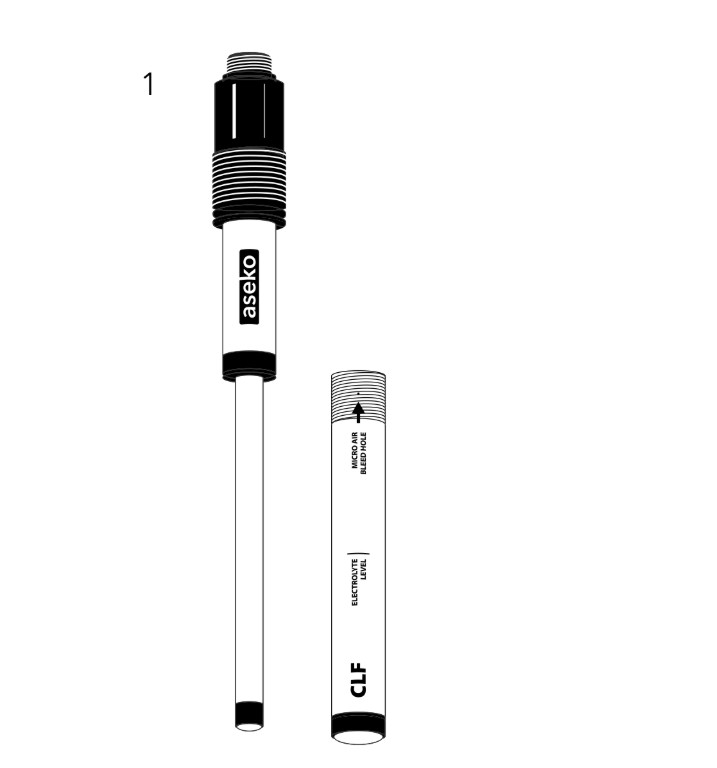
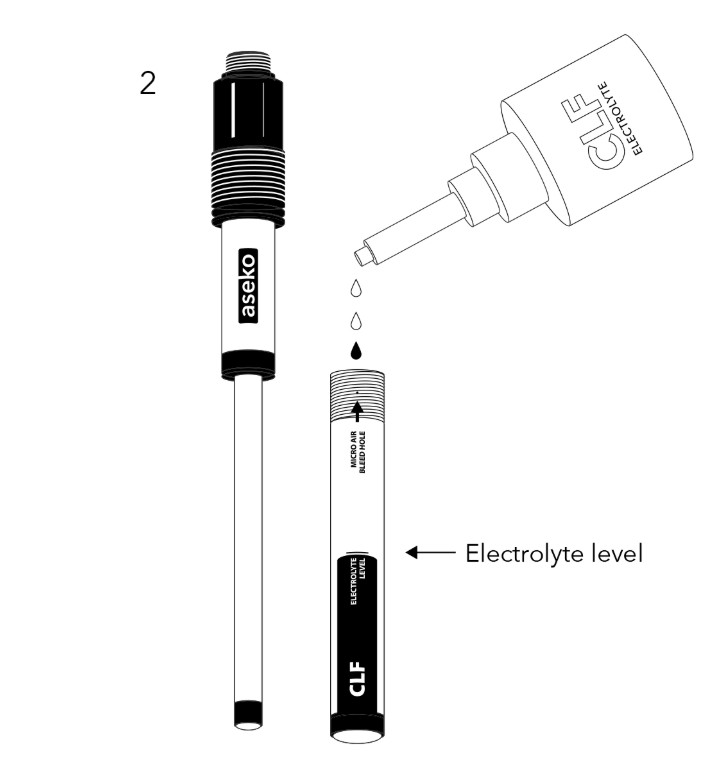
1. Fyldning af membranmodulet med elektrolyt
Fyld membranmodulet med den originale elektrolyt op til mærket. Bank forsigtigt på det for at fjerne eventuelle luftbobler.
2. Montering af sonde
Skru sonden fast i modulet. Hold samtidig membranen på undersiden med pegefingeren. Spænd til, indtil du mærker, at sondespidsen rører membranen. Efter montering skal membranen bule en smule ud. Hvis der ikke er direkte kontakt, måler sonden ikke korrekt. Overskydende elektrolyt løber ud gennem en mikroventil - denne må aldrig dækkes eller forsegles!
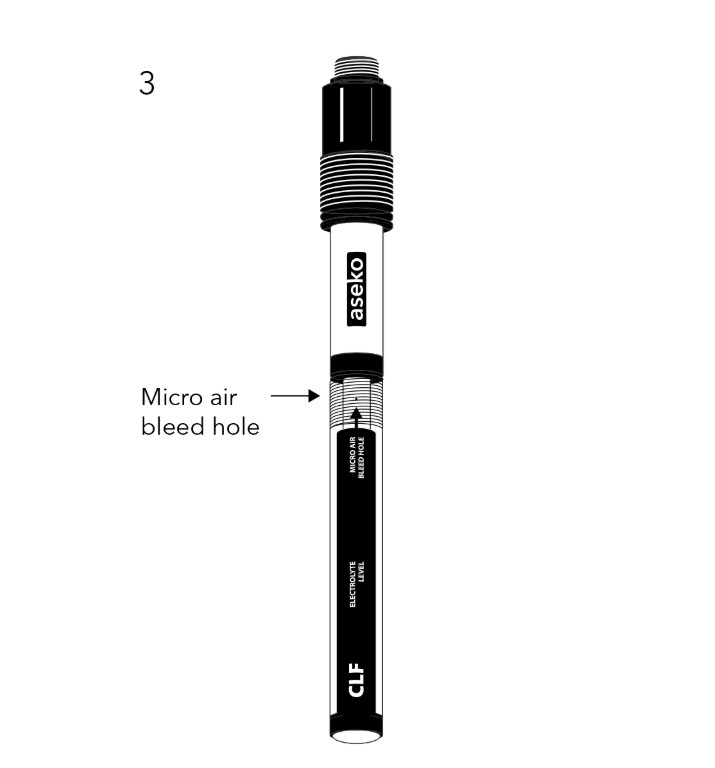
3. Activering af sonde
Før du placerer sonden i flowcellen, skal du ryste den (som et gammeldags termometer). Sæt den i flowcellen og tilslut kablet. Lad sonden stabilisere sig i mindst én time - så signalet kan tilpasse sig den nye elektrolyt. Når signalet er stabilt, kan du kalibrere.
|
Kalibrering af sonde
Du skal tildele en specifik koncentration af frit klor i mg/L (ppm) til det aktuelle mV-signal. Da signalet ikke er lineært i forhold til klorkoncentrationen, skal du kalibrere til den værdi, du ønsker at opretholde i poolen - eller en smule højere. Kalibrér aldrig til en lavere værdi.
|
|
Trin for kalibrering
- Tjek vandets pH - den skal ligge mellem 6,8 og 7,4. Uden for dette interval kan sonden vise forkerte værdier. Justér pH først, hvis nødvendigt.
- Mål frit klor med et digitalt fotometer (DPD1-test). Tag prøven efter pumpen og før filtret - så tæt på sonderne som muligt. Det minimerer fejl fra prøver taget direkte fra poolen.
- Hvis fotometeret og sondens visning afviger med mindre end 0,2 ppm, er kalibrering ikke nødvendig.
- Hvis fotometeret viser samme eller højere værdi end dit ønskede klorniveau, indtast denne i CLF-sondens kalibreringsmenu. Hvis værdien er lavere, skal du først hæve klorniveauet i vandet.
|
|
Eksempel på korrekt kalibrering
Hvis målet er 0,6 ppm, og controlleren viser 0,6 ppm, men fotometeret kun måler 0,3 ppm, skal du manuelt hæve målet på controlleren til 0,7 ppm og vente, til denne værdi vises stabilt. Mål derefter igen med fotometeret. Hvis fotometeret nu viser 0,7 ppm eller mere, indtast denne værdi i kalibreringsmenuen. Hvis ikke, gentag processen.
⚠️Kalibrerer du til en lav værdi (f.eks. 0,3 mg/L) og derefter sætter et højere mål (f.eks. 1,2 mg/L), risikerer du overdosering af klor.
|
 |

Typiske fejl skyldes dårlig kalibrering. Sørg altid for stabile forhold, præcise manuelle målinger og kalibrér til samme eller højere værdi end dit mål.
|
Ofte stillede spørgsmål fra praksis
Sonden stopper med at måle og viser under 20 mV, selvom der er mindst 0,5 ppm klor i vandet. Gør følgende:
Tjek for cyanursyre
Sørg for, at pool vandet ikke indeholder cyanursyre. Det kan komme ind via billige klortabletter eller lavkvalitets klorchok. Cyanursyre nedsætter kloreffektiviteten, forstyrrer målingerne og gør korrekt styring umulig. Hvis det er til stede, skal du fortynde vandet ved at tømme og genopfylde med frisk vand. Brug klorchok af høj kvalitet, som f.eks. PoolHelp - det er fuldt kompatibelt med ASIN AQUA-systemer og sikrer nøjagtige målinger.
Udskift elektrolytten
Følg samme procedure som ved første opstart.
Udskift membranmodulet
Defekte eller forurenede membraner forhindrer korrekt funktion.
Pro-tip
Mål sondens modstand med et ohmmeter. Modstanden mellem stikket og den ydre ring skal være præcis 1 MΩ.
|
|
Vedligeholdelse forlænger levetiden
> Fjern sonden under stilstand (f.eks. vinter), rengør den og opbevar den tørt ved stuetemperatur.
> Hvis sonden viser fejl eller ikke kan kalibreres, udskift elektrolytten eller hele membranmodulet.
> Skyl altid membranen og sondens krop med rent vand - og hold stikket tørt!
Undgå følgende
Brug ikke cyanursyre - det ødelægger kloreffektiviteten og målingerne.
Dæk aldrig mikroventilen - heller ikke efter montering.
Installer ikke prøvetagning efter filteret med retur efter pumpen - det kan føre til, at membranen mister kontakt med sondespidsen, hvilket giver upræcise målinger og risiko for overdosering.
Placér prøvetagningspunkter så tæt på sonderne som muligt - prøver fra poolen eller efter filtrering kan give misvisende resultater.
|


 Beregnere
 Kataloger
 Træningscenter
 Kontakt os
 Forhandlere
 Om welldana